
MySQL Replication is incredibly simple to get up and running and this post will instruct you through it.
Simple Master -> Slave Replication
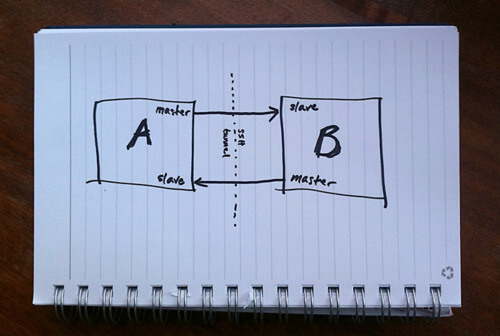
MySQL allows you to build up complex replication hierarchies, such as multi-master, chains of read slaves, backup databases at a remote site or any combination of these. This article focuses on a simple single master to single slave setup.
This article also assumes that 2 MySQL Servers have been installed but that there is no existing data in the master that needs to be copied to the slave – it’s not complex to add that extra requirement and it will be covered in a future post.
Server “masterhost” (192.168.0.31) is to be our master and “slavehost” (192.168.0.34) the slave.
Step 1: Edit the configuration files & start the MySQL Servers
The first step in setting up replication involves editing the “my.cnf” file on the servers that will serve as the master and slave. A default is provided with the MySQL installation but in case there is already a production MySQL database running on these servers, we provide local configuration files “master.cnf” and “slave.cnf” that will be used when starting up the MySQL servers.
At a minimum we’ll want to add two options to the [mysqld] section of the master.cnf file:
- log-bin: in this example we choose inodecloud-bin.log
- server-id: in this example we choose 1. The server cannot act as a replication master unless binary logging is enabled. The server_id variable must be a positive integer value between 1 to 2^32
master.cnf:
[mysqld]
server-id=1
log-bin=black-bin.log
datadir=/home/inode/mysql/master/data
innodb_flush_log_at_trx_commit=1
sync_binlog=1
Note: For the greatest possible durability and consistency in a replication setup using InnoDB with transactions, you should also specify the innodb_flush_log_at_trx_commit=1, sync_binlog=1 options.
Next, you’ll need to add the server-id option to the [mysqld] section of the slave’s slave.cnf file. The server-id value, like the master_id value, must be a positive integer between 1 to 2^32, It is also necessary that the ID of the slave be different from the ID of the master. If you are setting up multiple slaves, each one must have a unique server-id value that differs from that of the master and from each of the other slaves.
slave.cnf:
[mysqld]
server-id=2
relay-log-index=slave-relay-bin.index
relay-log=slave-relay-bin
datadir=/home/inode/mysql/slave/data
Now, start the MySQL servers using the service manager or directly from the command line if not being run as a service:
[kappy@masterhost ~]$ mysqld --defaults-file=/home/inode/mysql/master/master.cnf &
[kappy@slavehost ~]$ mysqld --defaults-file=/home/inode/mysql/slave/slave.cnf&
Step 2: Create Replication User
Create an account on the master server that the slave server can use to connect. This account must be given the REPLICATION SLAVE privilege:
[masterhost@inodecloud ~]$ mysql -u root --prompt='master> '
master> CREATE USER repl_user@192.168.0.34;
master> GRANT REPLICATION SLAVE ON *.* TO repl_user@192.168.0.34 IDENTIFIED BY 'inode';
Step 3: Initialize Replication
We are now ready to initialize replication on the slave; issue a CHANGE MASTER command:
slave> CHANGE MASTER TO MASTER_HOST='192.168.0.31',
 -> MASTER_USER='username_example',
 -> MASTER_PASSWORD='password',
 -> MASTER_LOG_FILE='',
 -> MASTER_LOG_POS=4;
Where:
- MASTER_HOST: the IP or hostname of the master server, in this example blue or 192.168.0.31
- MASTER_USER: this is the user we granted the REPLICATION SLAVE privilege to in Step 2, in this example, “repl_user”
- MASTER_PASSWORD: this is the password we assigned to ”rep_user” in Step 2
- MASTER_LOG_FILE: is an empty string (wouldn’t be empty if there were existing writes to be picked up from the master)
- MASTER_LOG_POS: is 4 (would likely be different if there were existing writes to be picked up from the master)
Finally, start replication on the slave:
slave> start slave;
Step 4: Basic Checks
Now we are ready to perform a basic check to ensure that replication is indeed working. In this example we insert a row of data into the “simples” table on the master server and then verify that these new rows materialize on the slave server:
master> create database inodecloud;
master> create table inodecloud.simples (id int not null primary key) engine=ndb;
master> insert into inodecloud.simples values (999),(1),(2),(3);
slave> select * from inodecloud.simples;
 +-----+
 | id  |
 +-----+
 |   1 |
 |   2 |
 |   3 |
 | 999 |
 +-----+
![]() About Kappy Prasad
About Kappy Prasad
Founder & CEO at iNode Cloud